Soldering copper can be a bit difficult. But it isn’t impossible! Here are a few tips to make it easier.
Tip 1: Go easy on yourself!
Confession time: after successfully soldering silver items, I thought I was getting quite good at it. Then I tried soldering copper and found it is rather a different prospect! There are some items I’ve had to attempt three times. Through research and a bit of trial and error, I’m improving and I hope the tips I’ve picked up your help you too, but if you don’t get it right first time, don’t worry. Clean up your pieces and have another go. You’ll get a successful join eventually – and everything else is learning!
Tip 2: Create a clean, flush join
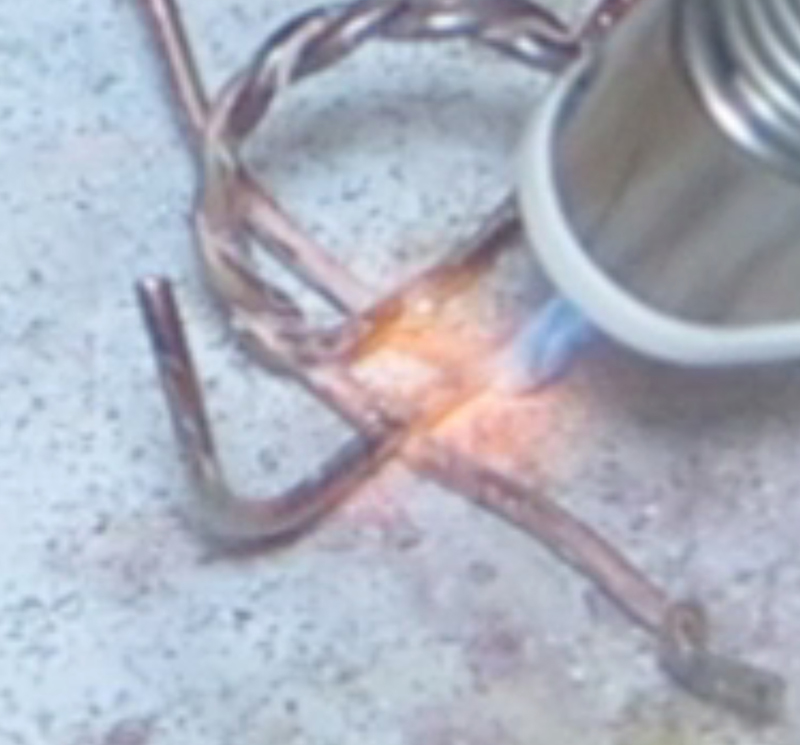
Solder flows into a heated joint by capillary action. The key to soldering is therefore to have a flush, tight join. If you can see daylight through the join you want to solder, the pieces aren’t fitting together tightly enough. Carefully file the areas for the join until they are flush. In addition, the larger the area of contact, the better. So if you’re soldering round wire, for example, filing a flat surface at the contact point will lead to a more successful solder. The joint should also be as clean as possible, so after filing remove any dirt, oil and oxides by pickling or using emery paper.
Tip 3: Choose the right solder
Solder need to reach a certain temperature to flow. One of the reasons that copper is difficult to solder is its speed in transferring heat, often away from where you want it! You can therefore make life a bit easier by using easy, or preferably extra-easy solder, which has a lower flow temperature. I have so far only used silver solder and I found extra-easy is much easier to work with for copper.
Tip 4: Don’t forget the flux!
Flux is essential in helping the solder to flow by reducing surface tension. It also reduces the oxidation of the copper which can otherwise interfere with successful soldering. Flux both the copper and the solder. If you find your soldier jumps the way from the joint dry heating the flux before placing your solder.
Tip 5: Larger flame = simpler soldering
This is, of course, relative to the size of the piece you’re soldering, but because copper transfers heat so well, soldering is easier if you can heat the whole piece up to soldering temperature.
Tip 6: Heat the copper, not the solder
This is another basic rule of soldering, but if you have trouble heating the whole piece, the temptation is to blast the bit with the soldier on it (and therefore the solder). This can then burn off some of the components of the solder, rendering it useless. Don’t forget, solder will flow into a heated channel. So if you’re concentrating your heat anywhere, direct it at the opposite side of the join to where the solder is sitting.
Tip 7: Clean off the excess solder
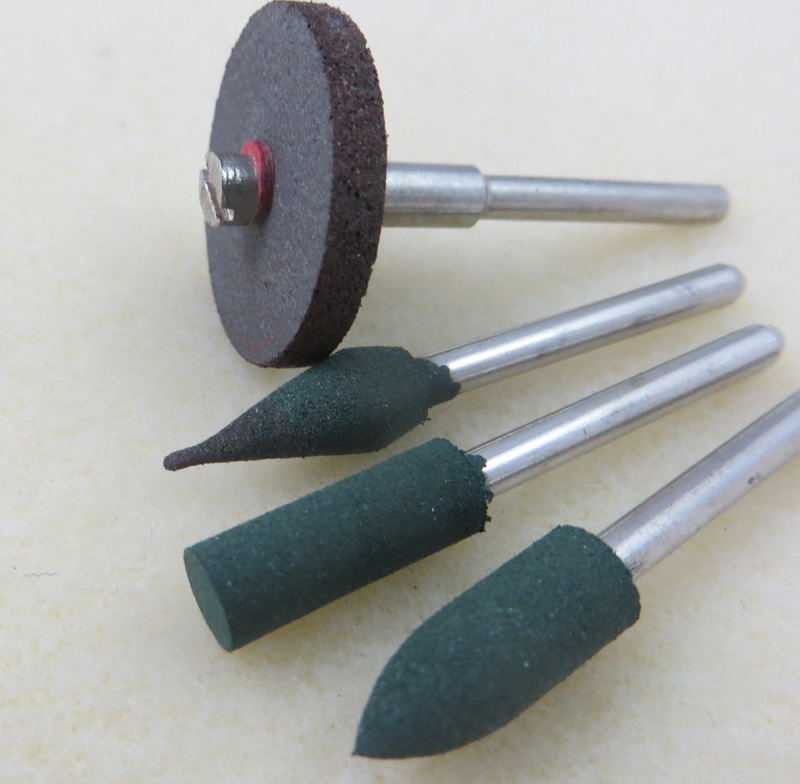
In using silver solder (I’ll be reporting on my tests with copper solder in a future blog) and despite my best efforts, my solder has a habit of wandering off to where it isn’t wanted. If you’ve managed a tight, flush join the solder in the join itself should be a tiny seam, if noticeable at all. But any excess solder can spoil and otherwise beautiful piece. There are many suggestions around the web of plating copper over it by pickling with steel added to the solution, but I haven’t had any success with this. And adding a liver of sulphur patina seems to make it show up even more. The most effective solution I’ve found is to remove it during polishing, by using the rubber polishing tips in my rotary tool. These take off the solder layer without digging into the copper and they have the additional benefit of creating a good shine on the piece.
I hope these tips help with your soldering. Do you have any other tips? If so, feel free to add them in the comments below. Happy soldering!