If you’re new to working with wire, the variety of gauges and types of wire can be overwhelming. So I hope this short guide will help.
Bare vs Coated Copper
A simple internet search for copper wire will bring up both coated and bare wire. On this site I’m mainly dealing with their copper as it has properties I need for the techniques want to use. If you like the bright copper colour, you might want to try an anti-tarnish coating, which will save applying a protective finish. You might also want to try colour-coated copper, but bear in mind that this won’t be suitable for heating, patina, filing etc, and I’ve yet to find a coated wire where the colour doesn’t rub off eventually. For the techniques on this site, look for ‘bare copper’.
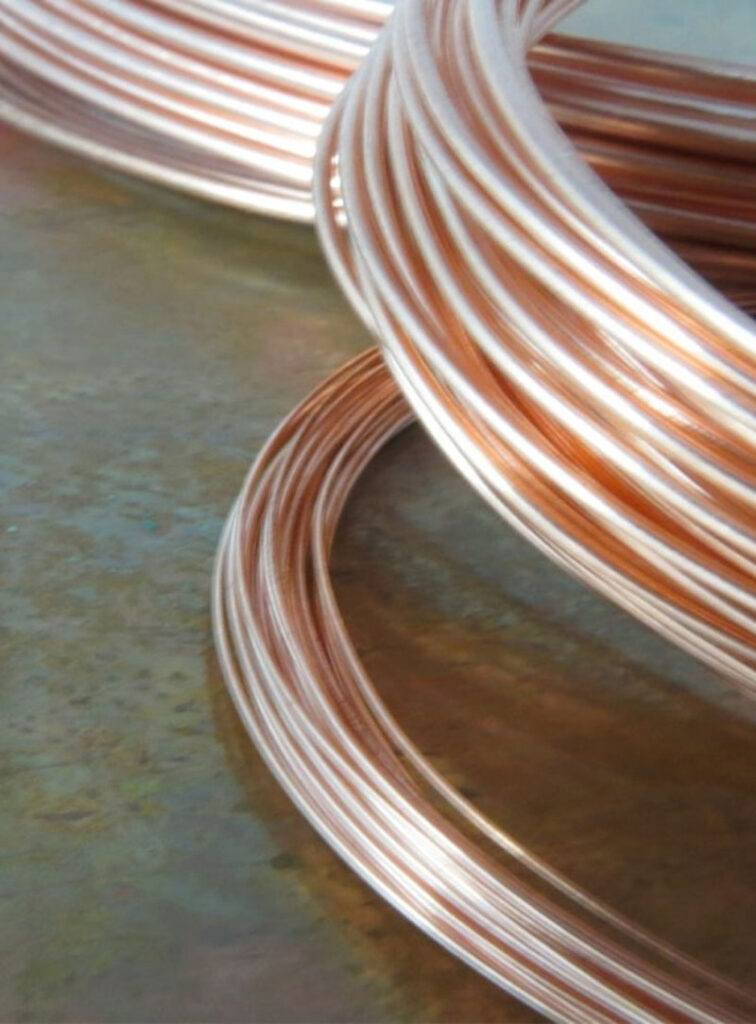
If you have worked with other wire previously, you may notice that copper can be extremely soft. This is a property we can use to our advantage, but if this is a problem the wire can be work hardened by hammering or pinching between flat-nosed pliers.
Which gauge?
I am often asked about the best gauge to buy. The simple, although perhaps unhelpful, answer is that it depends on what you want to use it for. So below, I list the most common gauges and what I use them for.
UK vs American Gauges
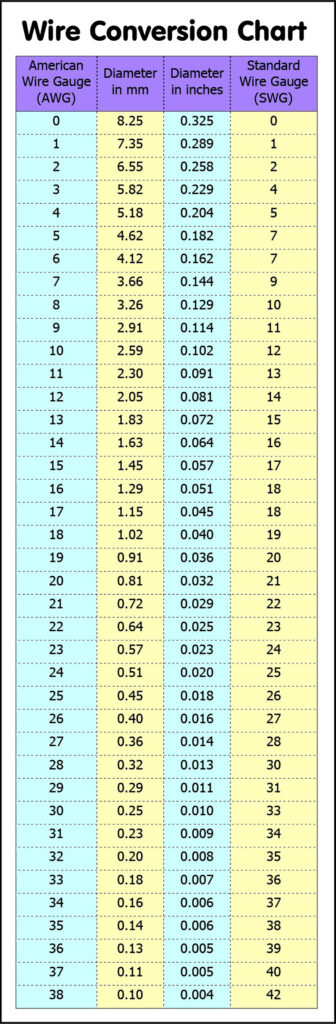
In the UK, the gauge of wire is generally listed as mm wire diameter, while America most often uses gauge numbers. I am using mm here, and in my tutorials, but conversion between the two can be made using the conversion chart here.
Common Gauges
0.25 mm: This is the smallest gauge I use and is a great gauge for weaving wire to create beautiful delicate weaves. It is a little notorious for kinking but shouldn’t be too problematic if used carefully. When you need to add in wire, the joint can usually be made to be invisible.
0.4 mm: The other standard weaving wire, and my recommendation for those new to wire weaving. It builds fairly quickly, and also is more secure for introducing beads to the design. It can be used for making beaded links, but would need to be made into wrapped loops, as the standard loops won’t hold.
0.6 mm: A bit of an ‘in-betweener’ wire. It can be used for weaving chunky designs, but also with care could be the frame wire. It can be used for making beaded links and findings, if work holding hardened to hold its shape.
0.8 mm: One of the standard frame wire gauges for weaving, great for making findings and for creating bead links.
1 mm: The other standard frame wire gauge, and my personal favourite. It can also be used in forging (hammering) techniques and is great for making jump rings for chain maille designs.
1.25 mm & 1.6 mm: both can be used as frame wires for chunkier designs, are great for forging and texturing and hold their shape well so are great for making brooches, rings and non-woven wire shapes.
2 mm: The thickest gauge I tend to use. Finding this is a little more difficult so I reserve it for basic shapes and rings etc. Brilliant for forging and texturing. Once flattened it is wide enough to easily drill punch holes into, so can be used for making items such as bar links.
For each of the tutorials on this site, I list the gauges I’m using, but feel free to experiment with thicker or thinner wires. The best designs can come from experimentation!